Cancelled Project - The Promise / Desolation
Game Information
Desolation (internal codename) was the first game I worked as a profesional technical artist. I was hired to be the tech artist of this project because Project M, which was entering preproduction, needed the only tech artist available at Coatsink. I do not know much about the origins of the project, but from what I know it was plagued by production problems by the start, in the end it was cancelled mainly because a game with first person shooter combined with driving mechanics is motion sickness inducing, it just wasn't viable as a product.
- Platform: Meta Quest 2
- Engine: Unity 2021 - Custom Render Pipeline
Here are some of the highlights of my work during the project's production
Environment Shaders
Terrain Shader
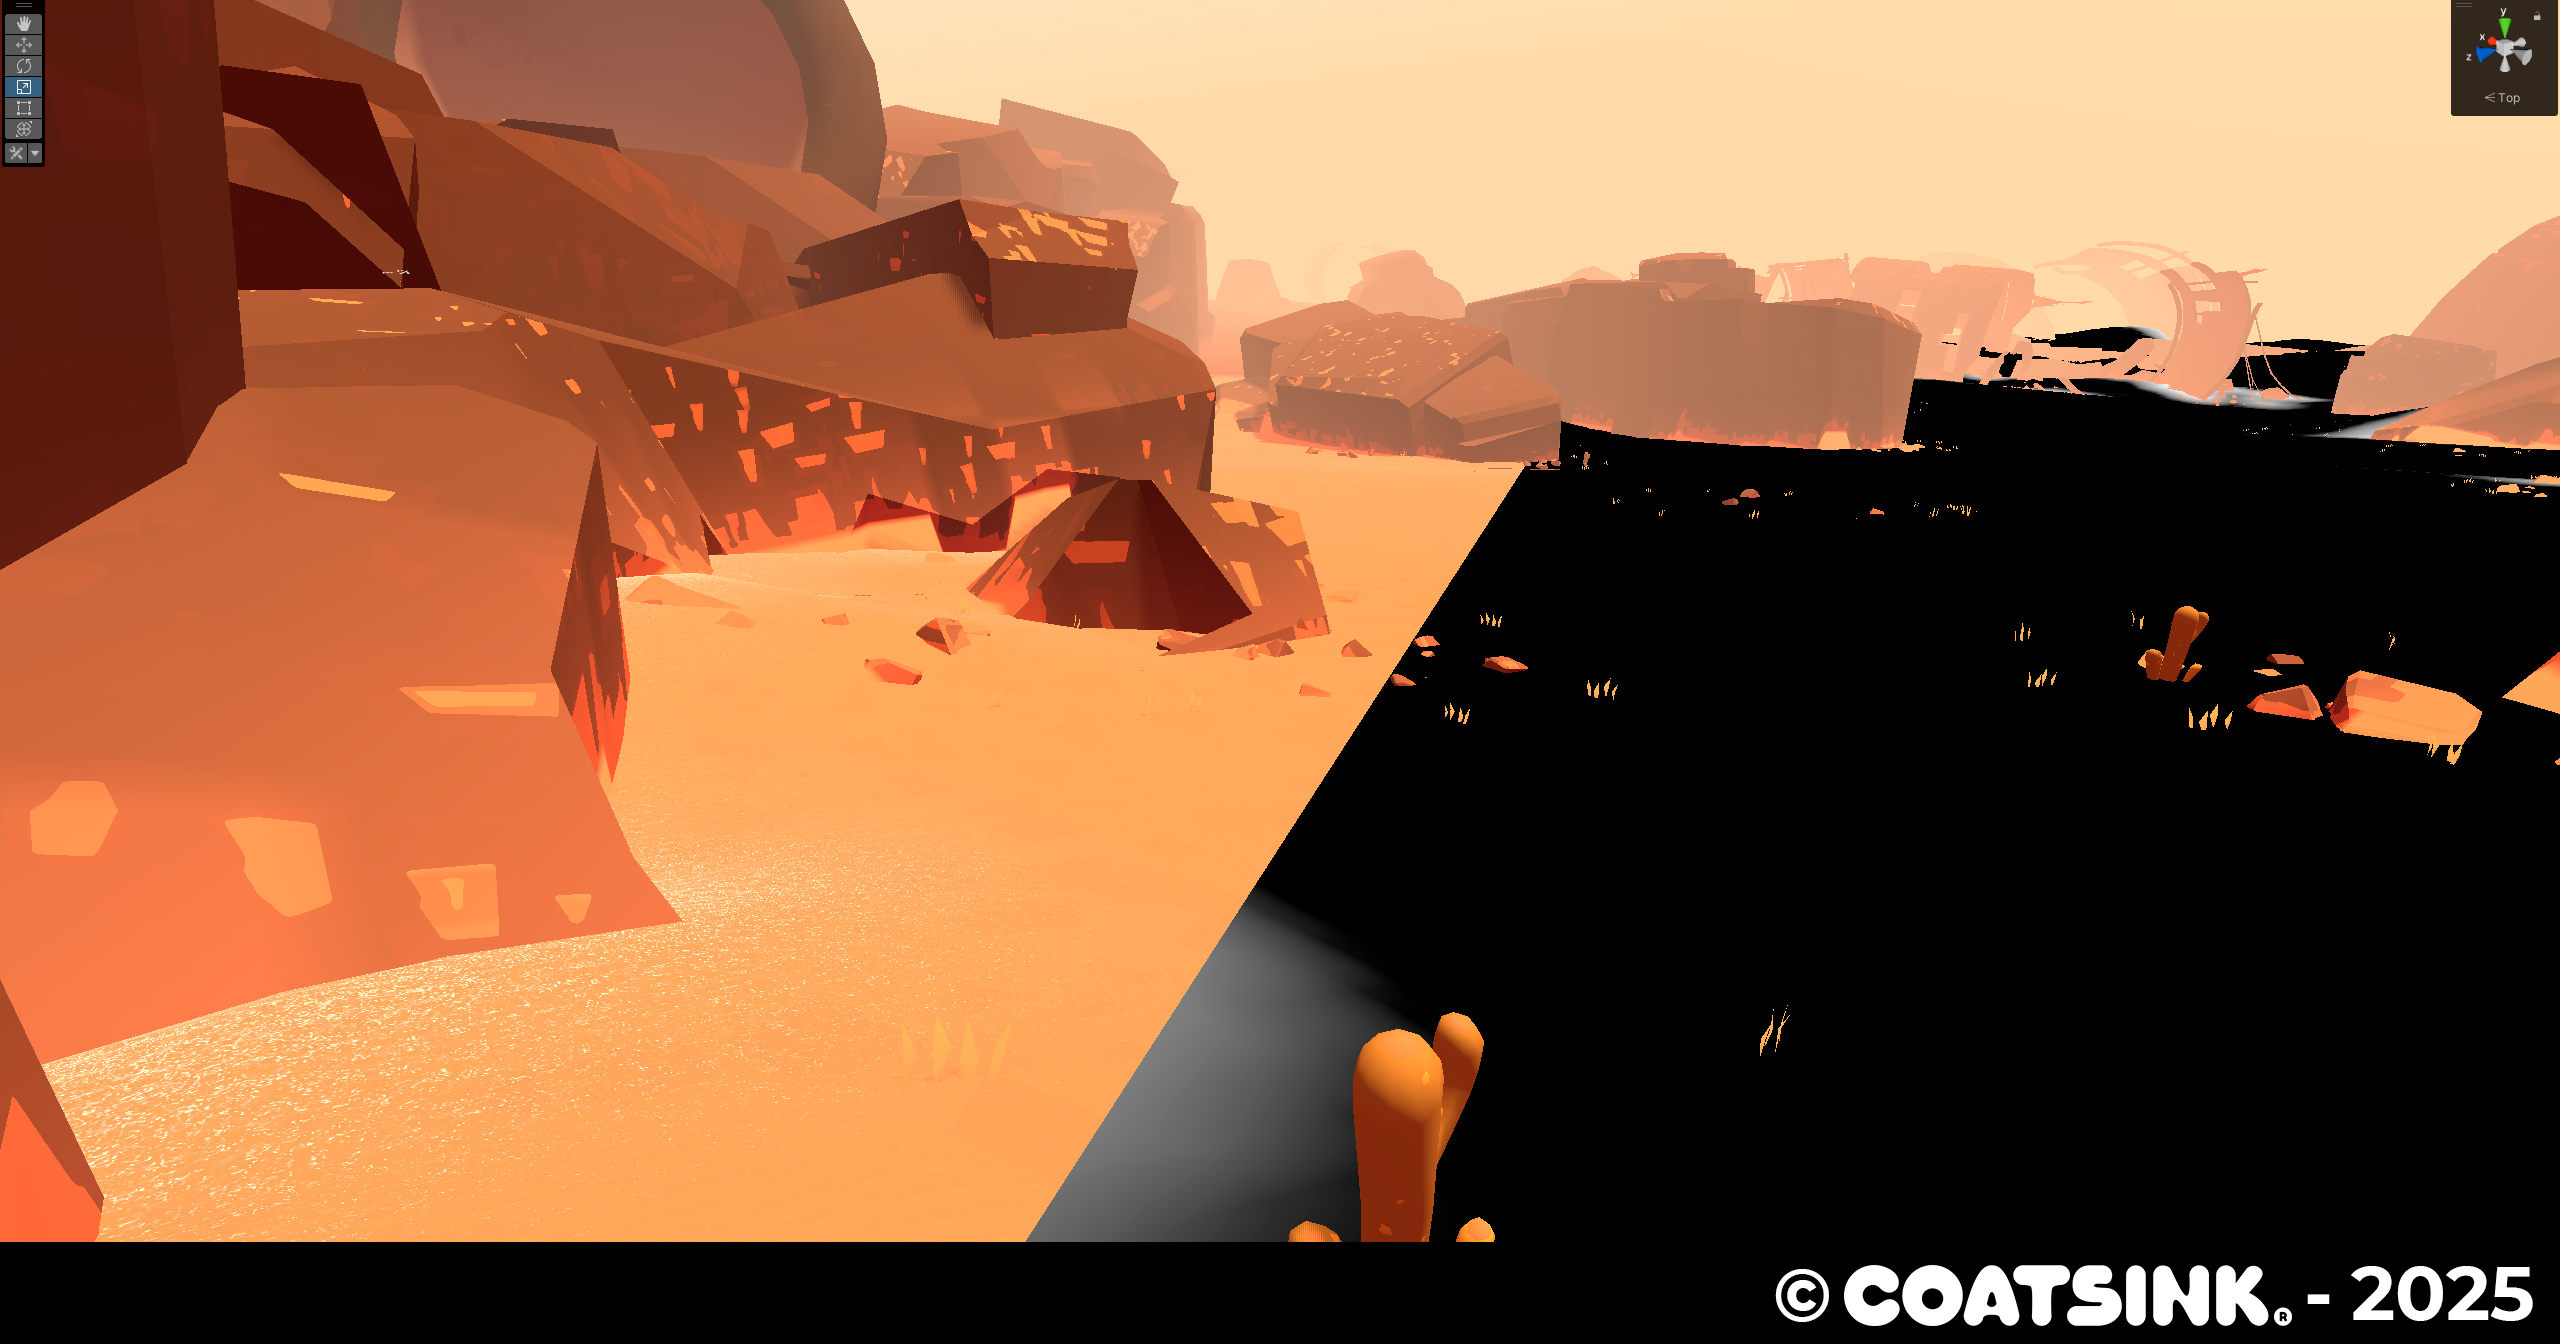
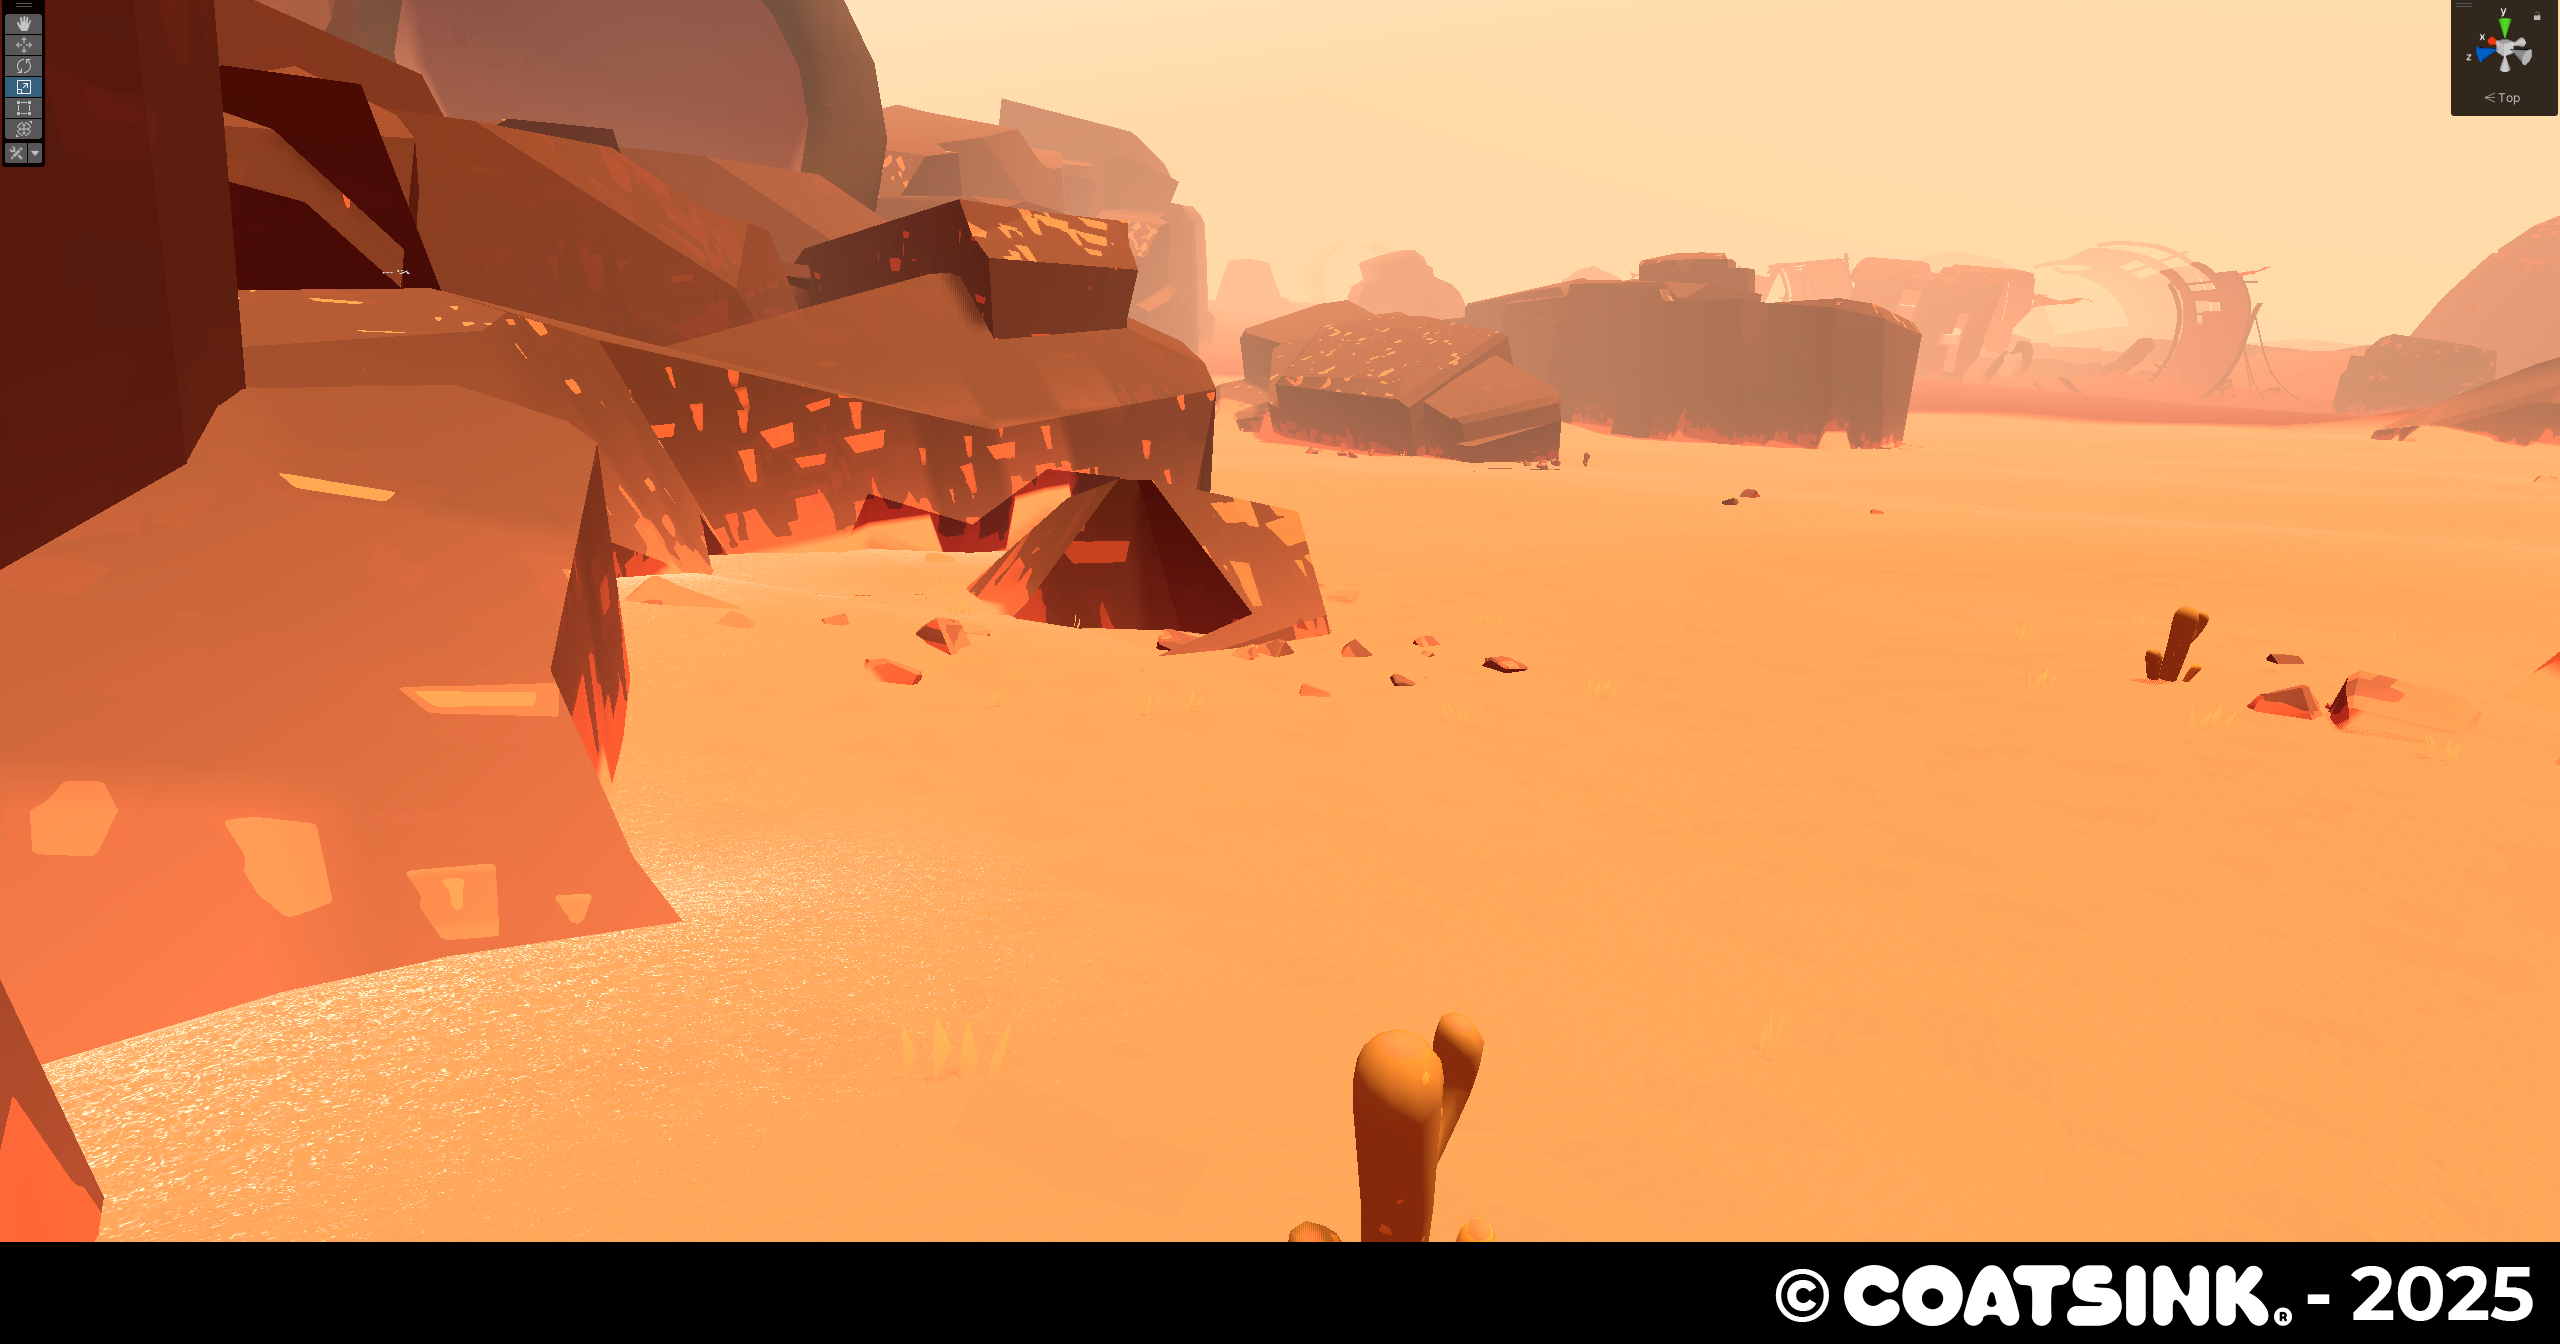
Desolation needed a fitting terrain shader that created the wasteland ambience the art director was looking for. Being a VR project we were faced with several problems that I needed to work around:
- It's really hard to read the depth and height of the terrain with just realtime lightning.
- Grainy sand looks really bad on VR, creating pixel shimmering and eye strain.
Here's what I did:
- Added two layers of fresnel, a subtle one to give players sense of depth and curvature and another that appears on edges to give players a better sentation of changing altitudes.
- Sand grains only appear where terrain and other environment objects intersect.
- The sand grain texture is sampled with a bias to avoid using mipmap 0 in order to minimize pixel shimmering.
Grass Shader
The first shader I did, nothing much to say about this, is just a simple shader with some fake subsurface scattering. Wind movement is controlled by a set of noise textures and a sphere mask (controlled by a simple C# script) moves away the grass when the player goes through it, it works by displacing the grass on a direction vector from the center of the sphere multiplied by sphere mask falloff.
Desolation Tools
3DS Max Desolation Baking Tool
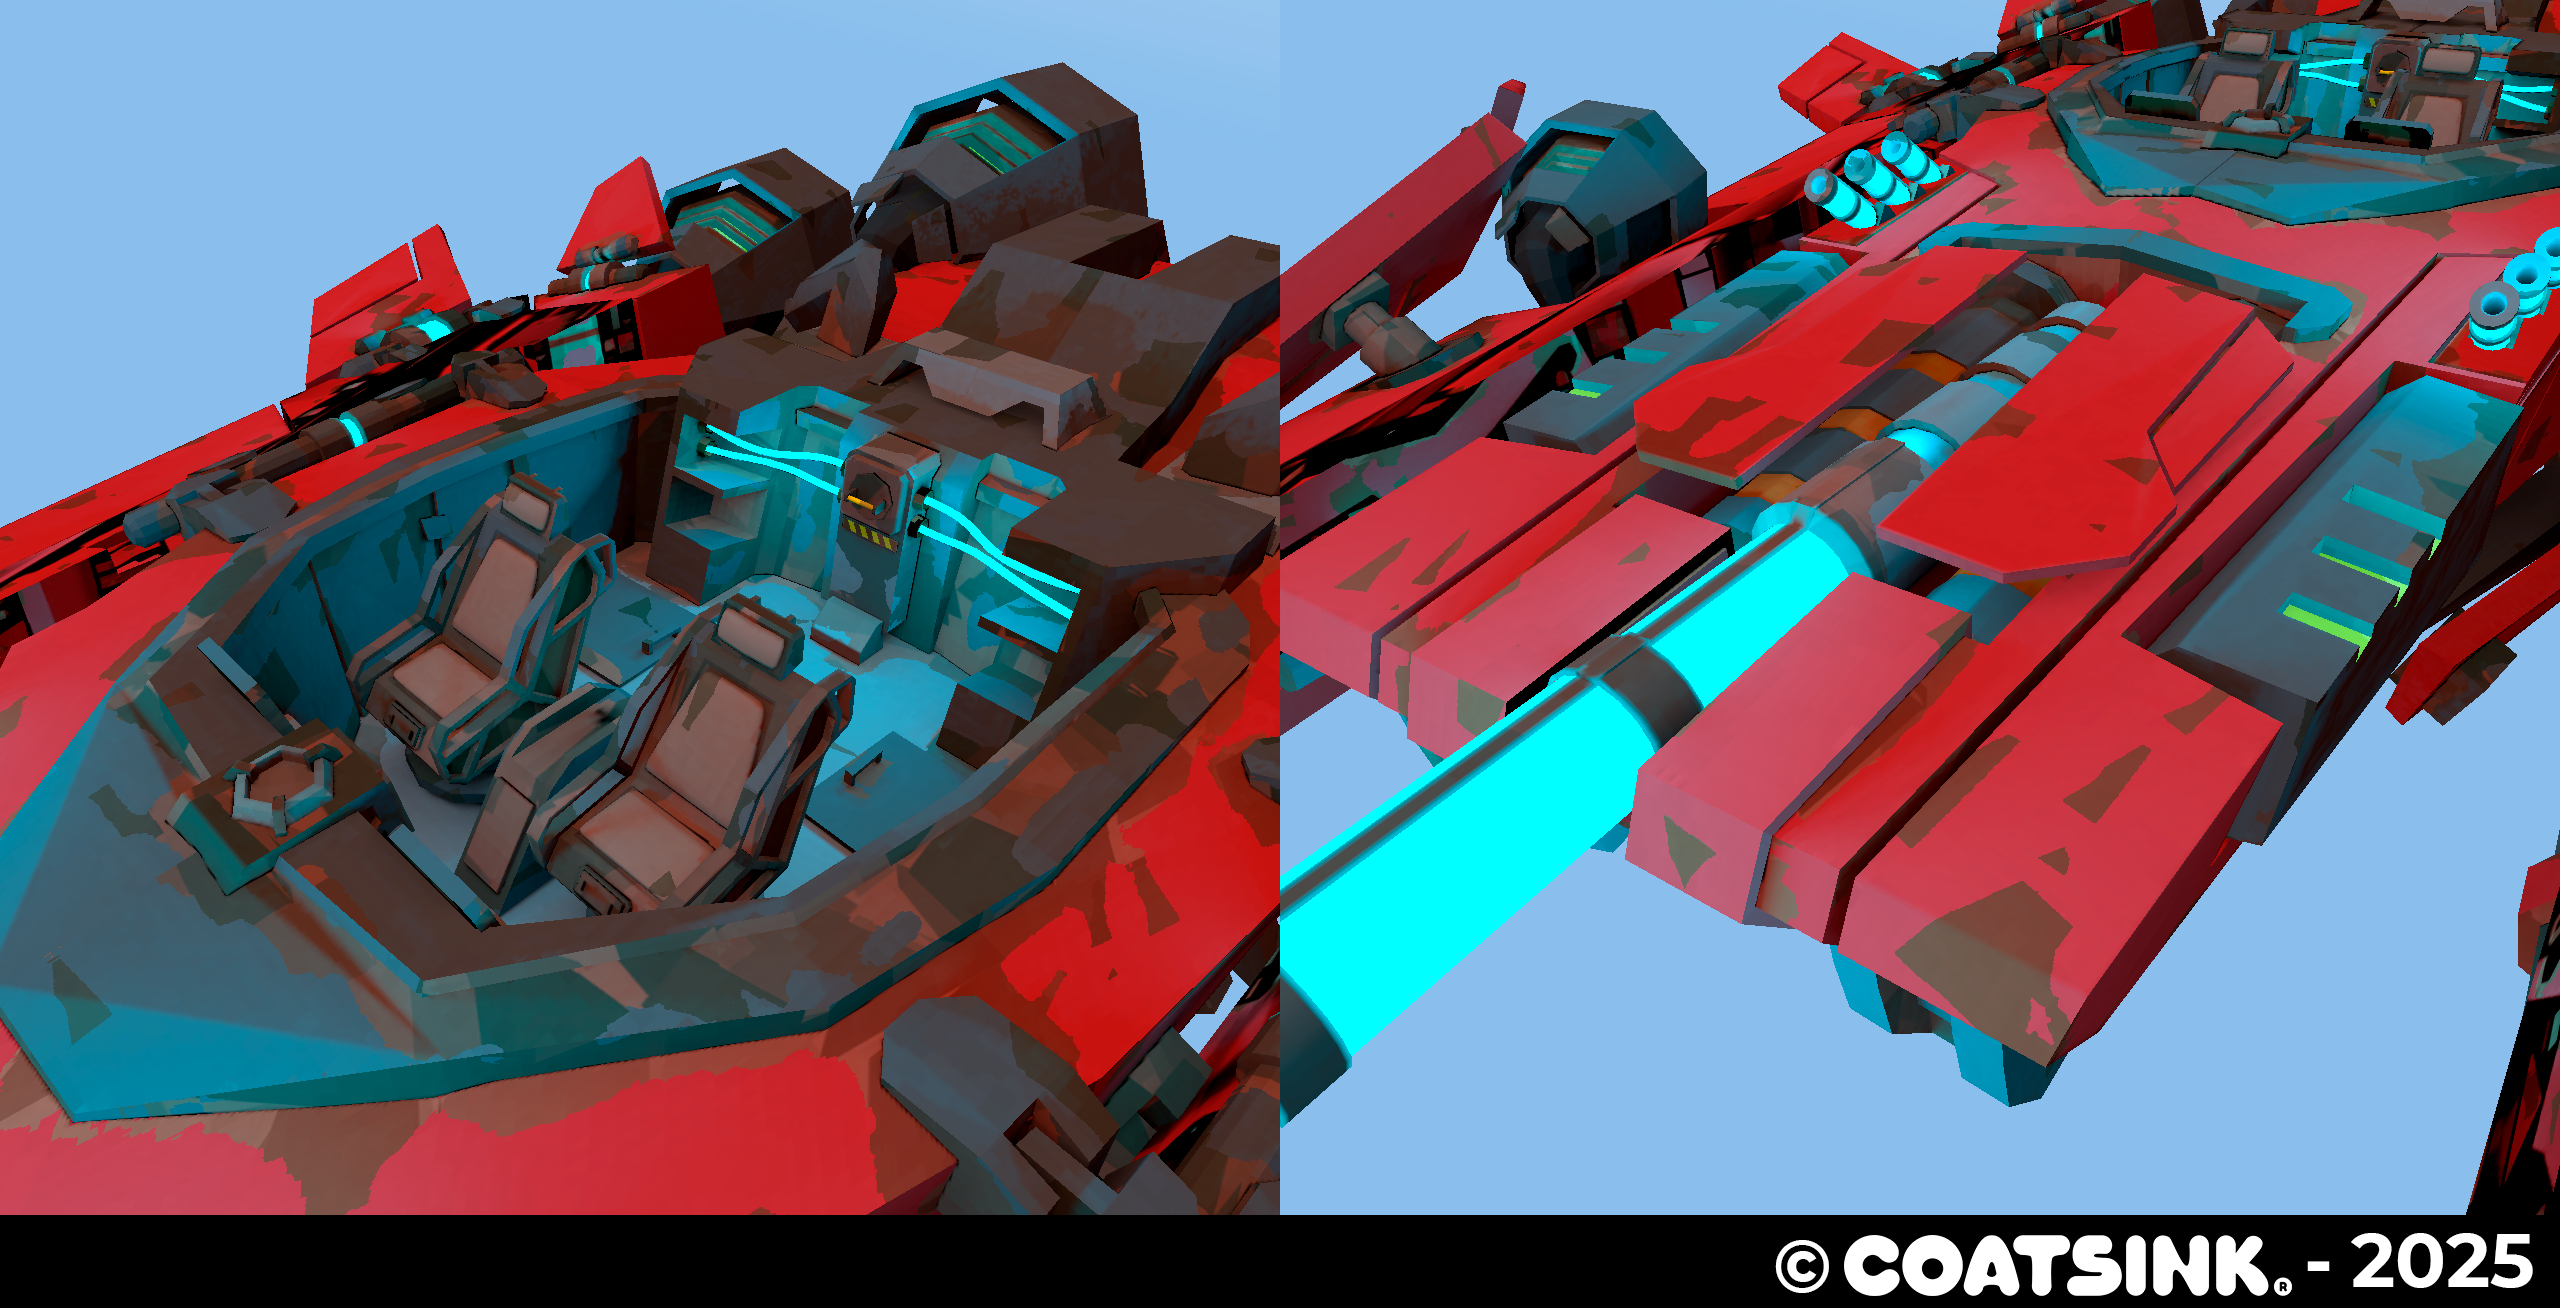
Dynamic objects like the player's ship and weapons did have a lot of emissives and wear and tear. In order to make those effects tangible on the shader we baked Emission Indirect lighting, curvature and AO manually as a texture inputed to the shader. That was the case til I made a MaxScript tool for the 3D artists of the project that baked the textures automatically and packed them into a single texture.
Internally it's really simple, it commands the Arnold renderer to make 3 Render Outputs (using the map baking uility) with different shaders stored in the plugin folder, stores them as separate textures on the output folder and finally grabs them and assigns each one to the RGB channels of the final texture.
Download the tool on the github repoository:
Grass Patch Tool
The team wanted a small tool to place patches of grass on the levels. I did a small tool that allowed artists to initialize a patch by setting up a bounding box on the scene, density, an array of meshes and a mask if they wish to do so. When everything is set up the tool then places a uniform mass of grass on the top parts of surfaces. Once initialized artists can edit the shape of patch with a brush to erase or add grass.
I'm going into technical territory next, this is the logic behind the tool:
- The tool creates an array of points on the top part of the bounding box in local space.
- Adds random noise on the XZ axis to each point.
- Using a mask sampled using local coordinates 0-1, if the value of the pixel in that point is less than 0.5 discards the point.
- Transforms the points from local space to world space using a transformation matrix generated using the Position, Rotation and Scale of the Bounding Box in world space.
- The tool does a rayscast downward to the bottom of the bounding box, if the ray hits with something it will spawn a mesh in the position where it hit.
- Intances the meshes using random rotation and scale based on the artists parameters when initializing the patch.
For the brush logic we had to avoid doing a brute force approach, so we did this to make it performant:
- Store groups of instanced meshes in chunks.
- Check when patch is selected and place the cursor gizmo where the user is using a camera raycast.
- Go through the chunks that are inside the radius of the brush with a bit of margin.
- Check through each loop and check if it's inside the area of the brush (if distance from center of brush is more than radius).
- Hide or show the instanced meshes depending on if the user wants to erase or restore foliage.
- When Unity compiles a build, a script runs before to merge every patch into a single mesh per scene.
Spline VFX Tool
Desolation was a game that featured very open areas to explore (fun fact, it was conceived to be an open world game!). Designers wanted to have some way to guide players through the level if the game noticed that the player was stuck.
We decided to add wind trails to guide the player, so I made a tool to design with splines the paths were wind could traverse. It's just a C# script where you can put a VFX to spawn and it will be attached and animated along the spline.
It has different spawn modes:
- Invoke Emission: VFX spawns when a method on the class is called
- Constant Loop Emission: VFX spawns inmediately when the particles die.
- Constant By Seconds: VFX spawns every few seconds.
- Random Emission: VFX spawns using a psudo random function, probability is chosen by the designer.
And different positions where the VFX can appear when spawns:
- Near Player: VFX Spawns at nearest spline point to the player.
- At Start: VFX Spawns at the start of the spline.
- Random Position: VFX Spawns at a random point of the spline.
Below is a video showing the spline tool with the VFX spawning near the player and constant emission:
Character Shaders / Hero Prop Shaders
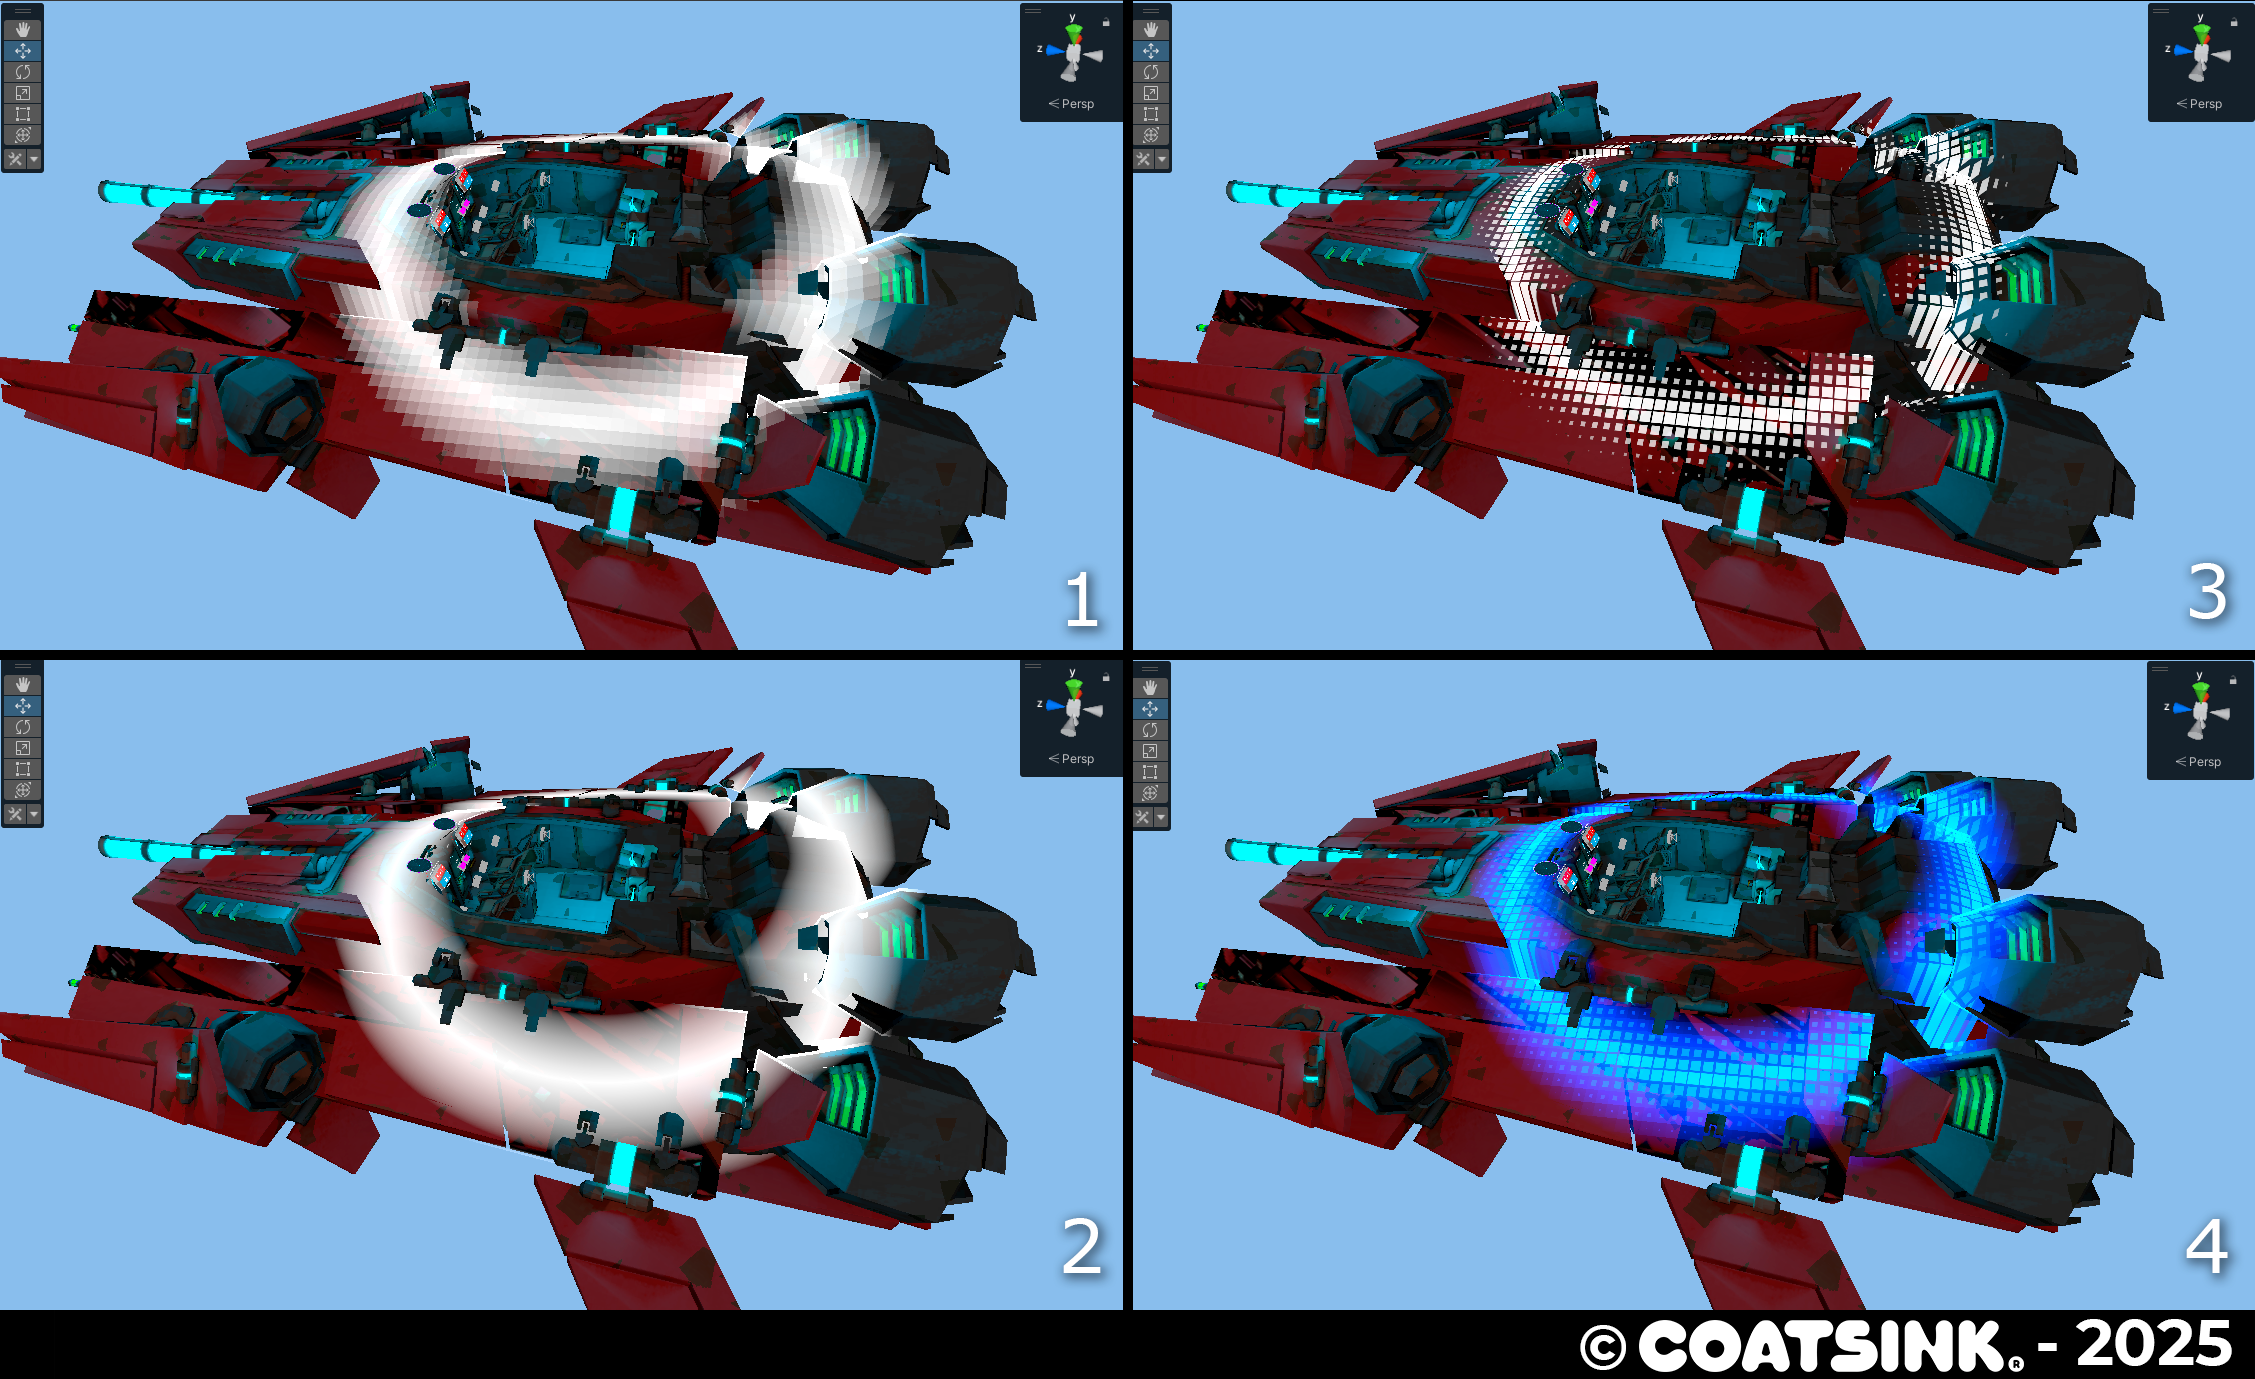
Ship Shield Shader
Our concept artist wanted the ship shield to feel like a second skin that reacted dynamically to the Shades/Enemies projectiles. Using a custom mesh that surrounds the ship and a custom shader it displays to the player where they've been hit (directionality) and the health of the different pieces of the shield.
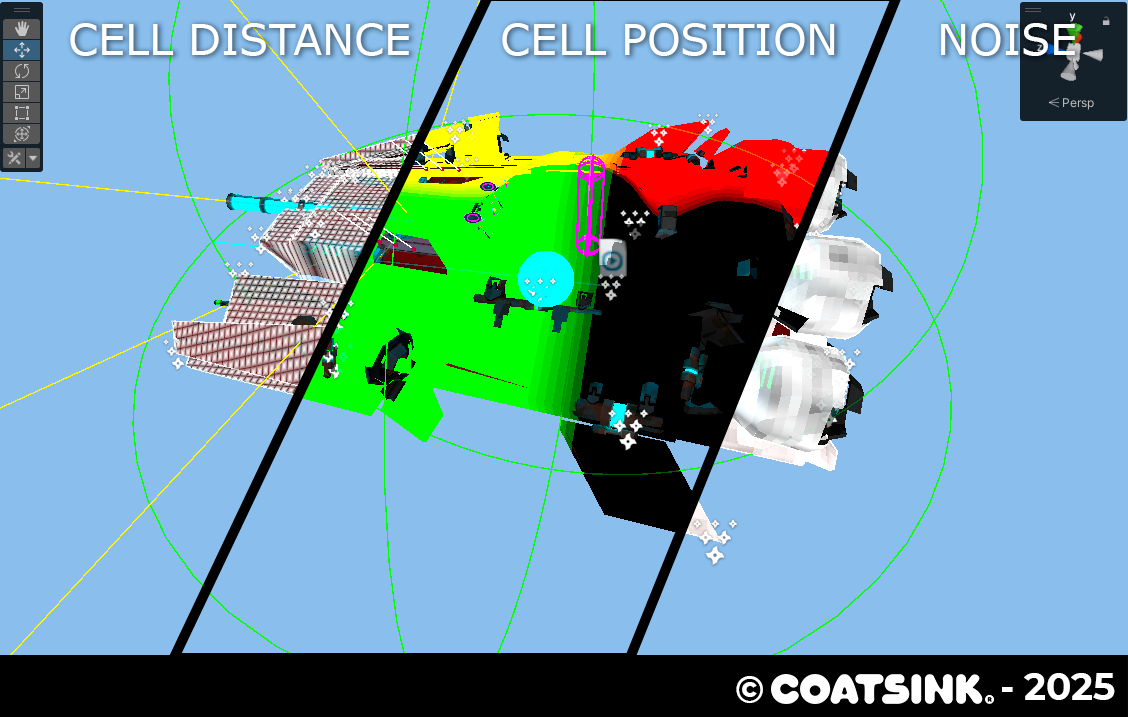
I'm going to enter technical territory again.
This is how the damaged part effect works:
- Cells are created using the XZ coordinates.
- Distance from the center of the cells is used to create the squares of the effect, size of the squares is dictated by noise.
- A sphere maks defines the area that has been damaged and by using a triangle wave it creates a subtle animation, cells are masked by the array of sphere masks.
This is how the pulse effect works:
- A loop that goes through an array (each element is 4 dimensional vector [Position XYZ + Expansion Radius]) creates rings using the cell world space position and other ring using world space coordinates
- For each element of the array: 1 - abs(distanceToPoint - radius) / waveThickness
- Cells are created using the cell distance and size is determined by the ring falloff, intensity is controlled by the value of the individual cells
- Add everything together using the maximum of all values.